TL;DR
Instagram Stories usually get blurry with music because the music sticker forces a second render and another compression pass. Export before upload at 1080x1920, 30 FPS, H.264 video, AAC audio, and a 3.5 Mbps target bitrate. Turn on Instagram’s “Upload at Highest Quality” setting and upload on stable Wi-Fi. Do not record or resize brand assets inside the Instagram app if quality matters. For UGC ads, pre-burn music, captions, and overlays before upload instead of stacking stickers in Stories.
You make a clean product Story. The bottle label is sharp. The subtitle is readable. The founder looks like a real person and not a watercolor painting.

Then you add a music sticker.
Instagram posts it, and the whole thing turns into mush.
For a personal account, that is annoying. For a brand, it is expensive. A blurry Story says one quiet thing before the viewer reads a word: this product might be cheap.
The short answer
Instagram Stories get blurry after you add music because Instagram has to re-render the video.
That is the core problem. The music sticker is not just a cute overlay. It forces Instagram to merge your visual track and audio layer into a new file, then compress that file again so it loads fast for users.
That extra pass is where quality usually dies.
The better workflow is boring but effective:
- Edit the video outside Instagram
- Add music, captions, text, and overlays before upload
- Export at 1080 x 1920 pixels
- Use 30 FPS
- Use H.264 video and AAC audio
- Target 3.5 Mbps bitrate
- Upload on stable Wi-Fi with Upload at Highest Quality turned on
If you run paid social, this is not a vanity thing. The source article’s operating benchmark is blunt: high-fidelity Stories maintain a 25% higher completion rate than blurry counterparts, and high-resolution content can see 15-20% greater organic reach.
Whether your exact account sees that number or not, the direction is obvious. Clear creative gets watched longer.
Why Instagram compresses Stories so hard
Instagram processes over 95 million photos and videos daily.
That volume explains the behavior. Instagram is not trying to preserve your lovingly exported product teaser like a film archive. It is trying to make billions of media views load quickly on phones with wildly different screens, processors, and connections.
So it compresses.
H.264 is the language Instagram expects
H.264 is the video compression standard Instagram commonly uses for playback. It works by removing redundant visual data from video frames.
That is fine when the file is prepared correctly. It is less fine when you upload something Instagram has to heavily reinterpret.
If your video is not close to Instagram’s preferred parameters, the platform transcodes it. Translation: it makes a new version of your file, usually smaller, usually rougher, and often noticeably blurrier.
The bitrate bottleneck
Bitrate is the amount of video data processed per second.
A high-quality raw or lightly compressed video might be 20 Mbps. Instagram Stories tend to land around 3-4 Mbps. Upload a 20 Mbps file and Instagram may reduce it by roughly 80%.
That is not a gentle massage. That is a haircut with garden shears.
The practical lesson: do not upload a giant 4K file and hope Instagram treats it nicely. Export a clean 1080p file close to the target bitrate before Instagram touches it.
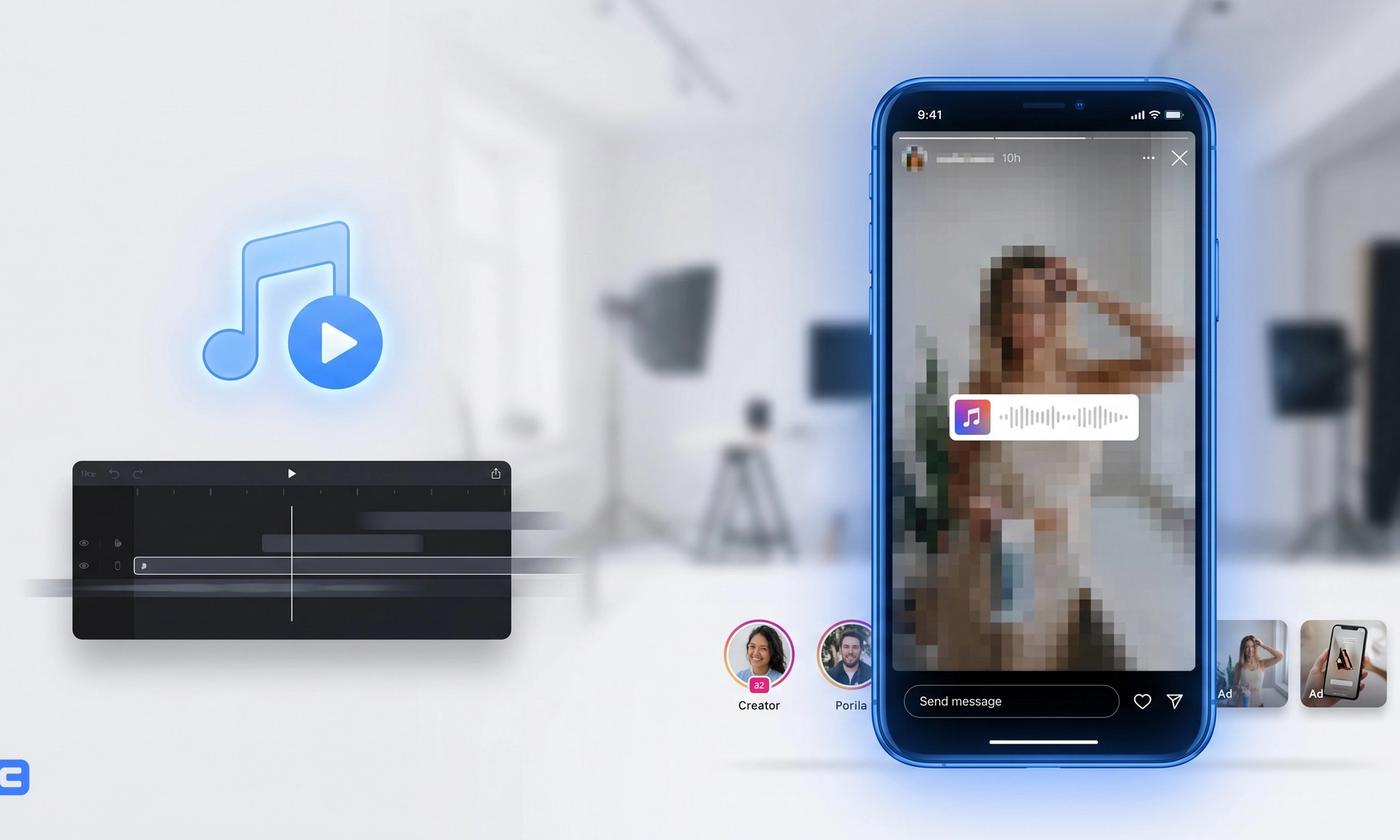
Why music stickers make Instagram Stories blurry
Music stickers trigger a more aggressive workflow because Instagram has to rebuild the file.
When you upload a video, Instagram already prepares it for Stories. When you then add a music sticker, Instagram has to combine the video track, the sticker layer, and the audio track into one final Story file.
That means another compression pass.
The double-compression trap
Most bad Story uploads follow the same path:
- First compression: Your phone records or saves the video, usually already compressed.
- Second compression: You upload it to the Instagram Story editor.
- Third compression: You add a music sticker, so Instagram renders a new composite file and compresses it again.
The third one is the killer.
Instagram will usually choose speed and reliability over fidelity. It wants the Story to publish. It does not care that the “New Arrival” text on your packaging went soft.
A simple example
Say you upload a crisp 1080p product video.
The packaging copy is readable. The logo is sharp. The texture of the fabric looks premium.
Then you add a “New Arrival” music sticker inside Instagram.
After posting, the small text on the product packaging becomes unreadable because the re-render lowered detail to handle the added data layer.
That is why brand teams should treat Instagram’s editor as a publishing tool, not a production tool.
Best Instagram Story export settings for 2026
The goal is to give Instagram a file it barely needs to touch.
Not too huge. Not weirdly encoded. Not 4K. Not 60 FPS just because your phone can do it.
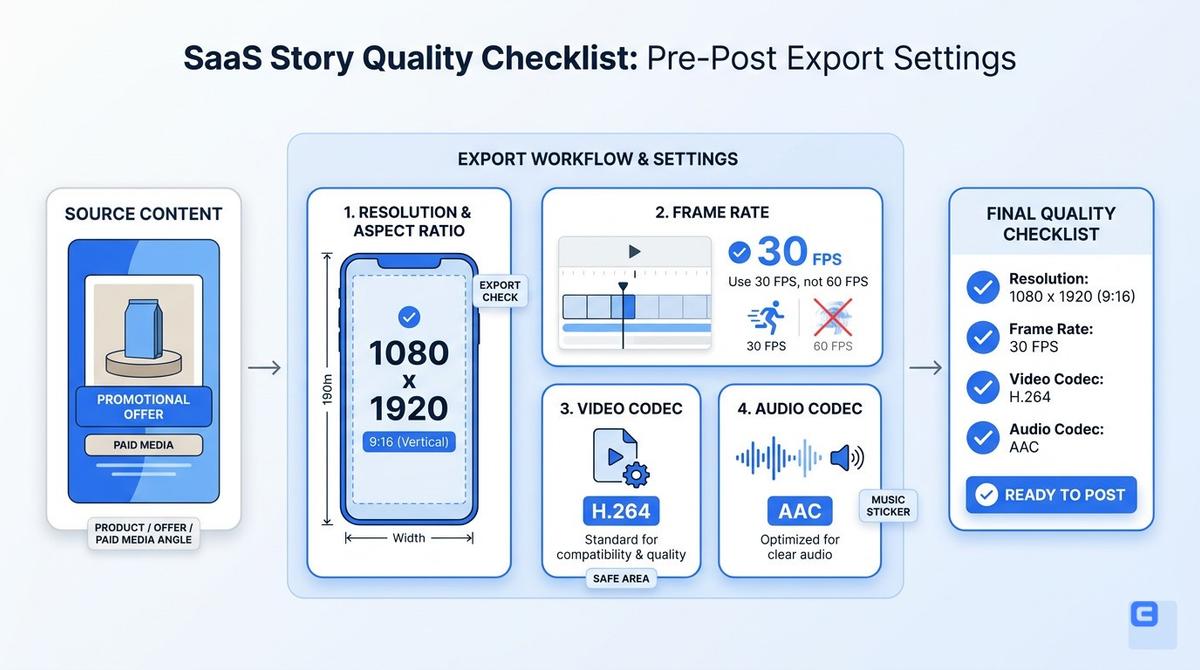
Use these settings before transferring the file to your phone or scheduling tool:
| Parameter | Optimal Setting | Why It Matters |
|---|---|---|
| Resolution | 1080 x 1920 pixels | Matches the native screen density of most smartphones exactly. |
| Frame Rate | 30 FPS (Frames Per Second) | 60 FPS requires more data; Instagram often compresses 60 FPS down to 30 FPS poorly. |
| Video Codec | H.264 | The native language of Instagram's video player. |
| Audio Codec | AAC | Ensures clear sound without sync issues. |
| Bitrate | 3.5 Mbps (Target) | The 'sweet spot' that balances quality with Instagram's file size limits. |
The counterintuitive part: avoid uploading 4K video to Stories.
4K sounds professional. In this case, it often creates more compression work. Downscale in your editor, where you control the export, instead of letting Instagram’s servers do it on the fly.
The cleanest workflow for brand Stories
If the Story matters, build it before Instagram.
That means music, text, captions, logos, product callouts, and disclaimers should be baked into the video file. Not added as a stack of stickers five seconds before posting.
For DTC brands and performance teams, this is the same reason AI UGC workflows have become popular. Traditional UGC often costs around $200/video when you hire creators, then you still have revision loops, export mistakes, and platform formatting work. EzUGC can generate AI UGC video ads for around $5/video, with realistic AI avatars, 29 publicly listed languages, and more consistent formatting across variants.
The real win is not just price. It is control.
You can create a batch of creator-style Story ads, burn in the music and captions, export them at the right specs, and test hooks without begging three creators to re-shoot the same line.
Troubleshooting blurry Instagram Stories

If you are already exporting correctly and your Stories still look soft, check these in order.
Most teams want to blame the algorithm first. Fine. But a lot of Story quality problems are caused by one ugly setting, one bad upload connection, or one careless resize in the app.
1. Turn on Upload at Highest Quality
This is the boring fix that actually works.
Instagram may throttle upload quality to save mobile data. As of 2026, the setting typically lives under:
Settings & Privacy > Data Usage and Media Quality > Upload at Highest Quality
Turn it on.
Also check that any “Use Less Cellular Data” setting is off if you are uploading brand assets. A perfect file can still get crushed if Instagram thinks you are trying to conserve data.
2. Upload on stable Wi-Fi
A weak connection can ruin a good file.
If your upload drops packets or slows down midstream, Instagram may dynamically reduce quality so the post still succeeds. That is good for casual posting. It is bad for a product launch.
Do not upload important creative from a moving car on 4G or 5G.
Use stable Wi-Fi. Wait the extra five minutes. It is cheaper than posting a blurry sale asset to 40,000 followers.
3. Stop using the Instagram camera for brand content
The native Instagram camera is convenient. It is not the best camera on your phone.
Your phone’s stock camera app usually has better image processing, stabilization, HDR handling, and lens support. Instagram’s in-app camera is built for speed, not maximum quality.
Record with your phone camera or a real camera. Edit externally. Export correctly. Then upload the finished file.
iOS vs. Android Story quality issues
The gap has narrowed, but the operating systems still behave differently.
Instagram has historically been easier to optimize on iOS because there are fewer iPhone models. Android has thousands of device and camera combinations. That fragmentation matters when an app tries to support every sensor and lens.
Android users: avoid the in-app camera
On Android, this is the rule: do not use the Instagram camera for serious brand content.
Use the native camera app from your device manufacturer. That software knows the lens and sensor better than Instagram does.
Then edit, export, and upload.
If your Story is a founder clip, product demo, or AI UGC ad variant, keep the capture and export pipeline outside Instagram until the final upload.
iPhone users: watch the HDR setting
iPhones often record in High Dynamic Range by default.
That can look beautiful in your camera roll. But Instagram Stories do not always handle HDR conversion cleanly. The result can be washed-out colors, blown highlights, or weird exposure shifts when the file gets converted to Standard Dynamic Range.
If you see that, turn off HDR Video in your iPhone camera settings and test again.
Not forever. Just test it like an operator. Same scene, same lighting, HDR on versus HDR off, then upload both privately or to a test account.
Common mistakes that wreck Instagram Story quality
The frustrating part is that you can do 90% of this right and still lose quality at the end.
Small workflow mistakes create big visual damage because Instagram is already compressing your file. Do not give it more reasons.
Too many GIF stickers
GIF stickers are dynamic elements, just like music stickers.
Every moving sticker adds processing weight. Layer three flashing “Sale” GIFs on top of a product video and you are basically asking Instagram to re-render your Story into soup.
Better move: create the sale animation in your editor and burn it into the final file.
Manual resizing inside Stories
Pinching, zooming, and dragging media inside the Story editor is a quality tax.
If your image or video is not already 9:16, Instagram has to scale it. Scaling stretches pixels. Stretched pixels look soft.
Crop before upload at 1080 x 1920. Make the file fit the frame from the start.
Ignoring safe zones
Quality is not only pixels. It is readability.
If your logo sits under the profile icon or your CTA sits behind the “Send Message” bar, the Story may technically be sharp and still fail.
Keep text, logos, and key product details inside the center 1080 x 1420 pixel safe zone. That gives Instagram’s UI room to sit on top without hiding the point of the creative.
A simple quality checklist before you post
Use this before posting any Story that has a product, offer, or paid media angle.
- Export at 1080 x 1920 pixels
- Use 30 FPS, not 60 FPS
- Use H.264 video codec
- Use AAC audio codec
- Set target bitrate to 3.5 Mbps
- Add music before upload, not with the music sticker
- Burn in captions and offer text before upload
- Keep important text inside the 1080 x 1420 pixel safe zone
- Turn on Upload at Highest Quality
- Upload on stable Wi-Fi
- Avoid the Instagram in-app camera for brand assets
- Turn off iPhone HDR Video if colors look washed out after posting
This is not glamorous. It is just the difference between “why does this look cheap?” and “ship it.”
Key takeaways
The main reason Instagram Stories get blurry with music is double compression.
You upload the video. Instagram prepares it. Then you add music, so Instagram renders the whole thing again and compresses it again.
To avoid that:
- Export at 1080 x 1920, 30 FPS, and 3.5 Mbps
- Use H.264 video and AAC audio
- Add music, captions, and text before upload
- Turn on Upload at Highest Quality
- Upload over stable Wi-Fi
- Avoid Instagram’s in-app camera for brand content
- Disable iPhone HDR Video if Instagram creates washed-out Stories
If you are making one casual Story, use the sticker.
If you are making a product ad, a launch Story, or UGC creative that has to convert, do not let Instagram become your editing software.
Create cleaner UGC ads without fighting export settings
The best fix for blurry Stories is a cleaner creative pipeline.
EzUGC helps DTC brands, agencies, and performance marketers create realistic AI UGC video ads in minutes instead of days. You can generate creator-style videos, test hooks, create variants, and export platform-ready assets without paying around $200/video for every traditional UGC creator clip.
EzUGC AI UGC costs around $5/video, supports realistic AI avatars, and currently lists 29 languages publicly.
If your team is still stitching together creator clips, music stickers, captions, and last-minute Story edits by hand, that is a lot of places for quality to break.
Build the ad once. Export it correctly. Then upload the finished file.
Sources and citations
- Instagram Help Center: Data settings and media quality · Meta
Reference for Instagram account settings, upload behavior, and media quality controls.
- H.264 Advanced Video Coding overview · International Telecommunication Union
Technical reference for the H.264 video compression standard commonly used across social video platforms.
- Instagram Stories ad specs · Meta Business Help Center
Reference for current Meta creative specifications and recommended formats for Stories placements.
Frequently asked questions
Direct answers pulled into the page to improve answer-first relevance and scanability.